
Interactive Tutorial
Adobe Captivate Text to Speech
Convert text into natural-sounding narration using Captivate’s text-to-speech feature
-
Learn by Doing
-
LMS Ready
-
Earn Certificates

Try this Course with a Free Trial
Captivate includes a built-in text-to-speech tool that you can use to generate computerized narration of your project's slide notes.
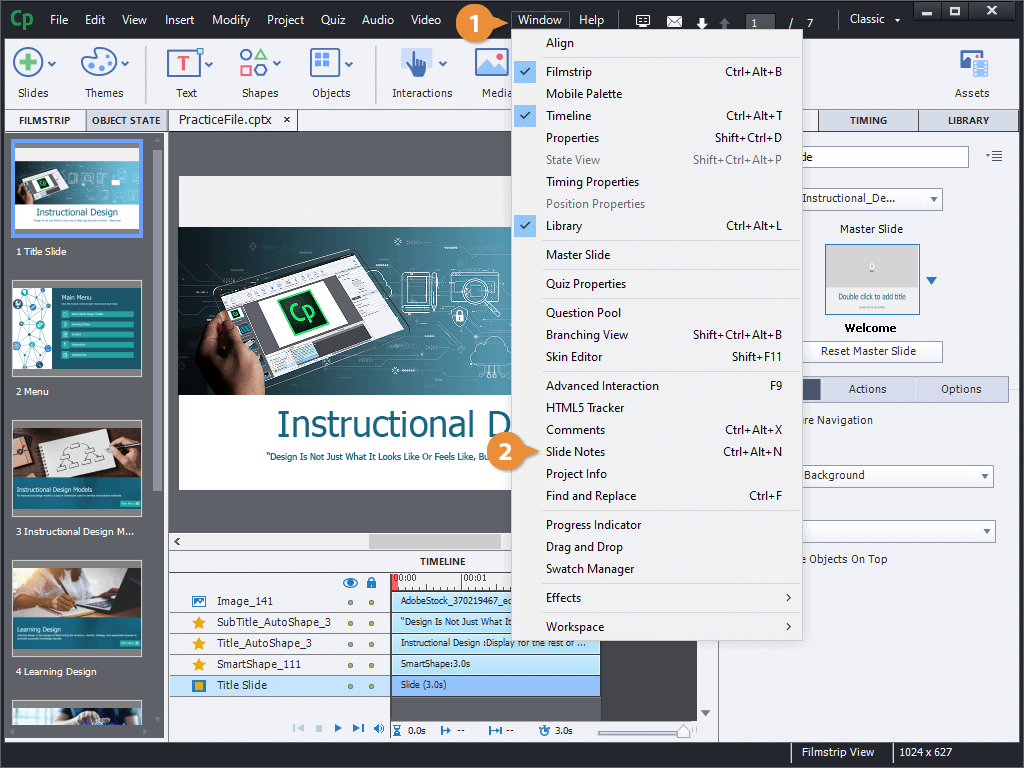
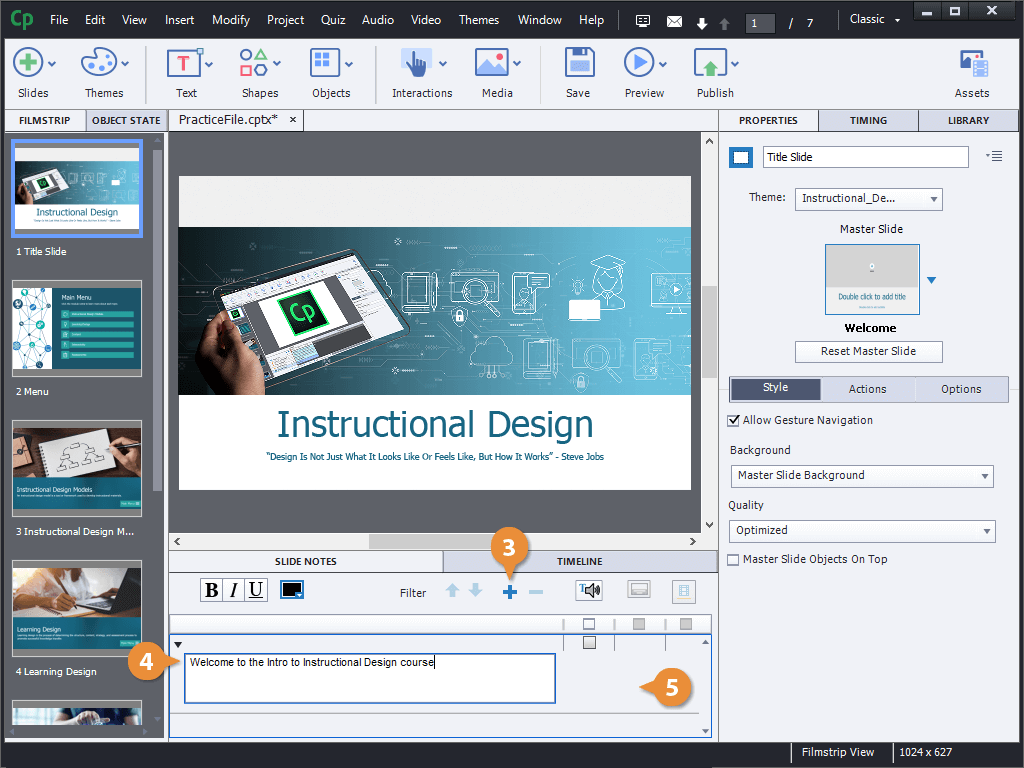
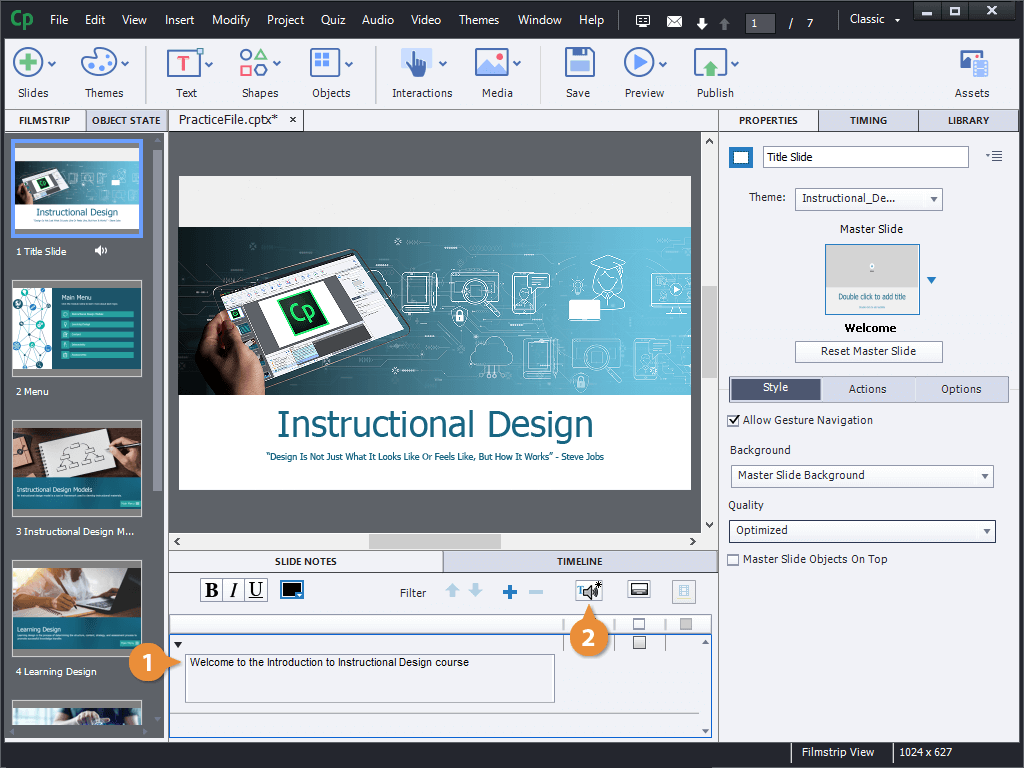
Display and Enter Slide Notes
- Click Window on the menu bar.
- Select Slide Notes.
- Click the Add Slide Note button.
- Type a note in the text field.
- Click outside of the note field.
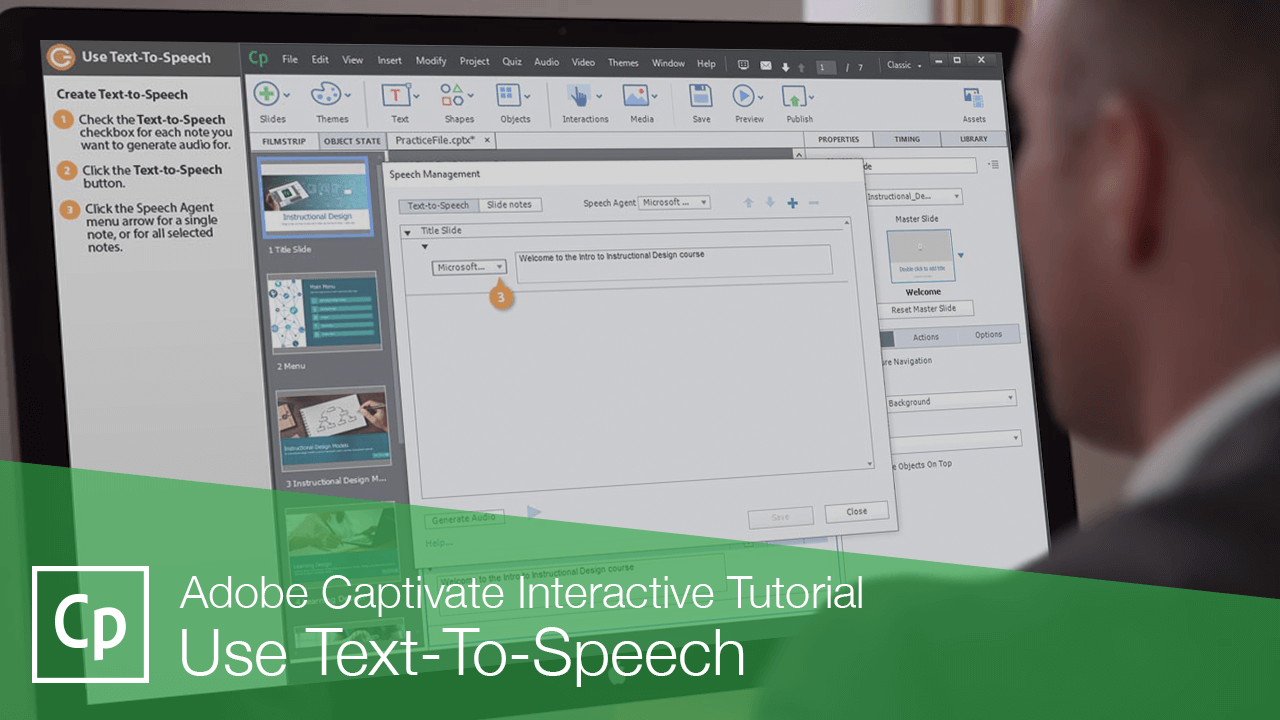
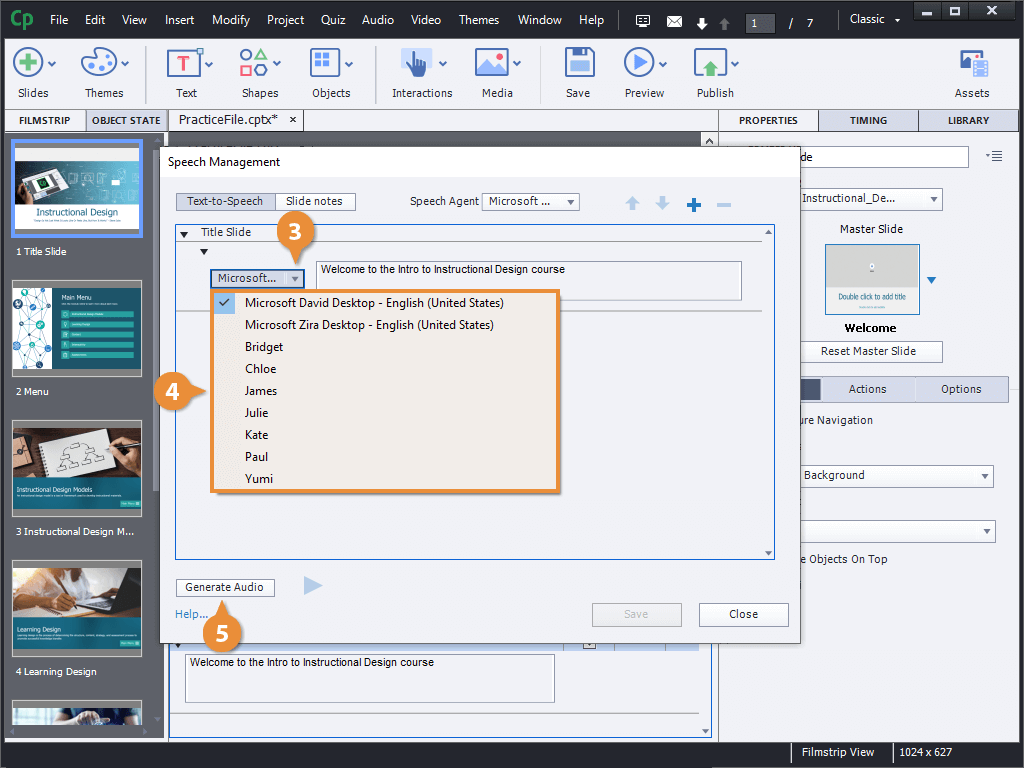
Create Text-to-Speech
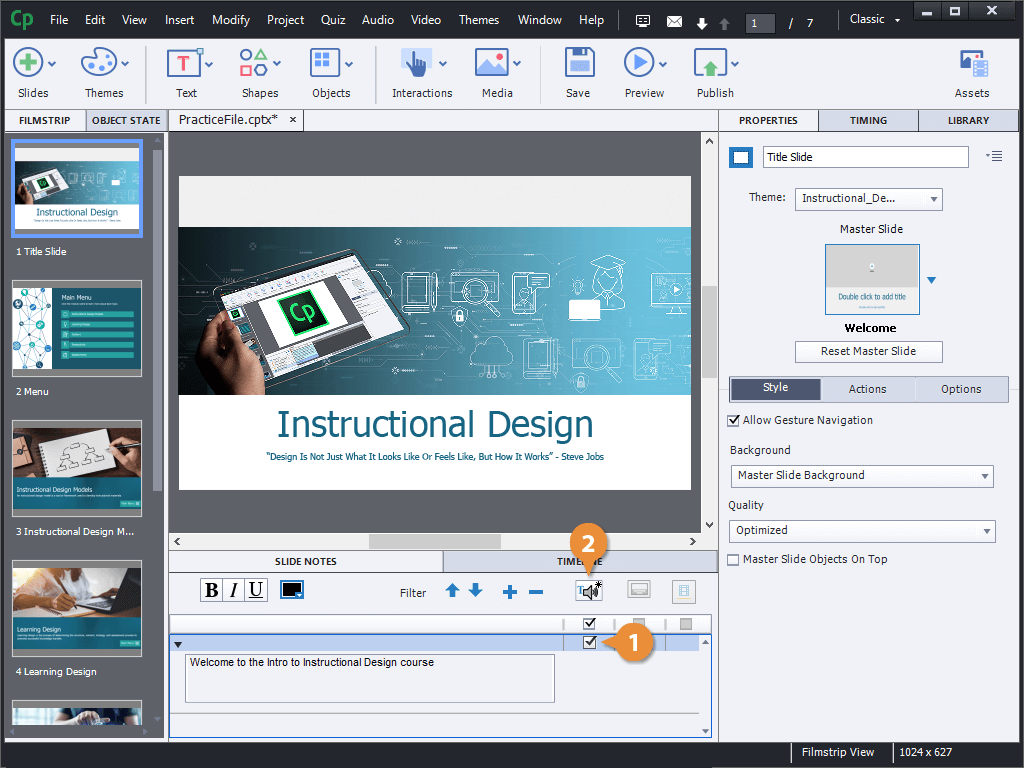
- Check the Text-to-Speech checkbox for each note you want to generate audio for.
- Click the Text-to-Speech button.
- Click the Speech Agent menu arrow for a single note, or for all selected notes.
- Select a voice.
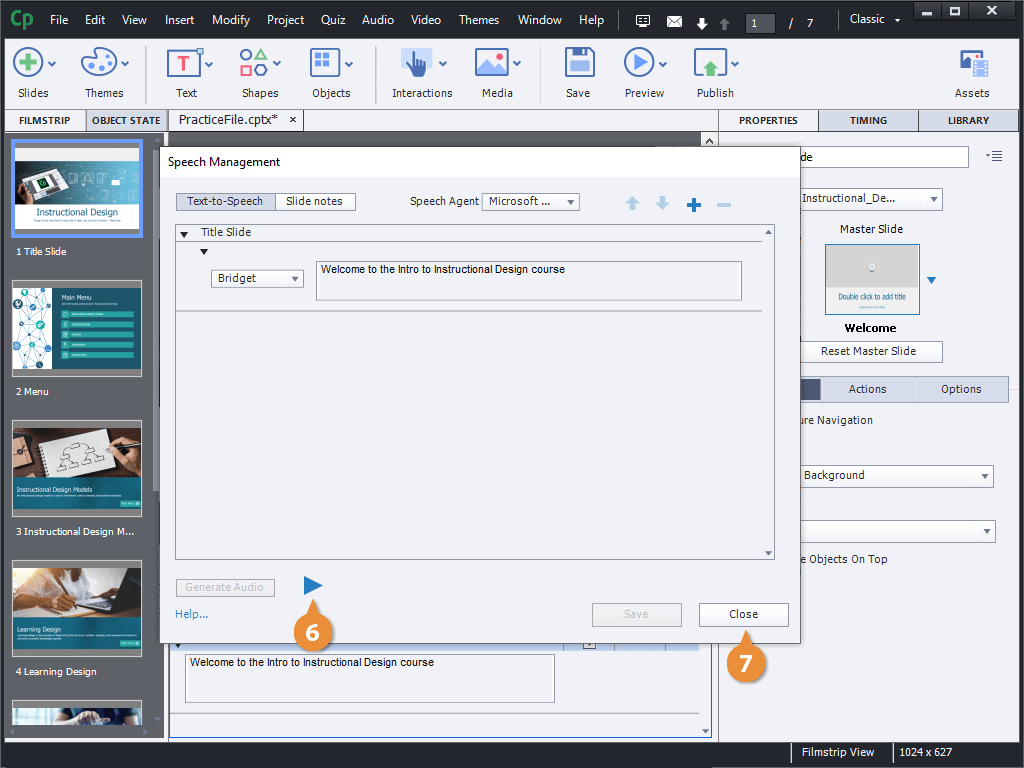
- Click the Generate Audio button.
- Click the Play button to play the generated audio.
- Click Close.
Edit Text-to-Speech
- Edit the text in a slide note with text-to-speech enabled.
- Click the Text-to-Speech button.
- Click the Generate Audio button.
- Click Yes.
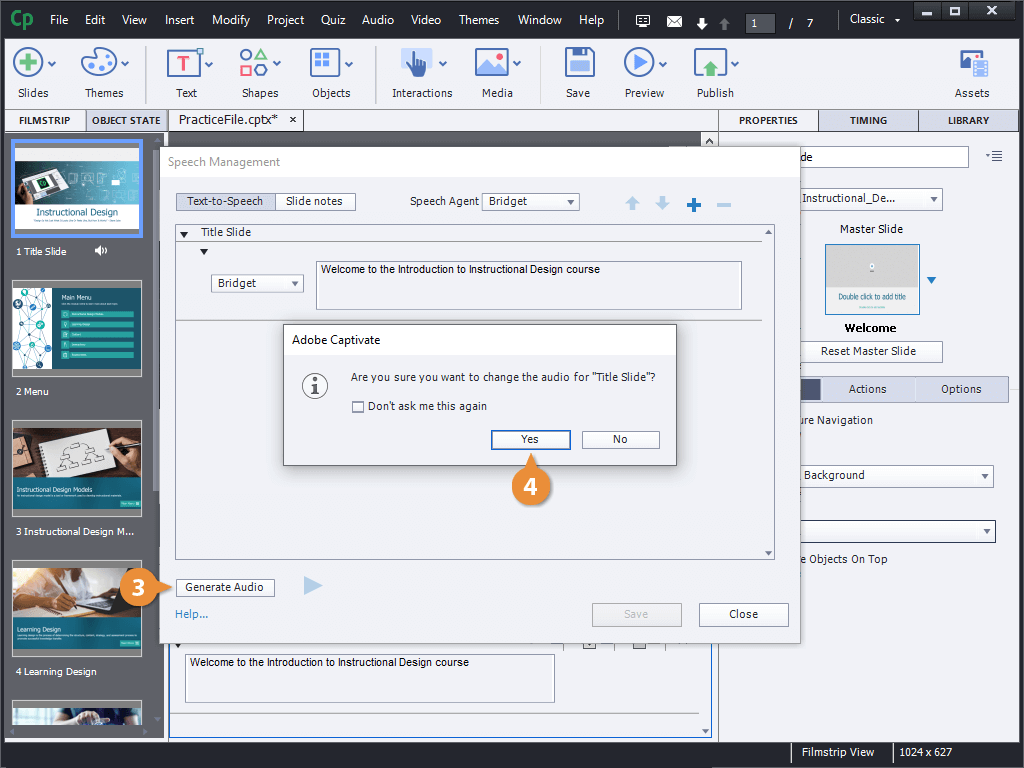
- Click the Play button to play the updated audio.
- Click Close.
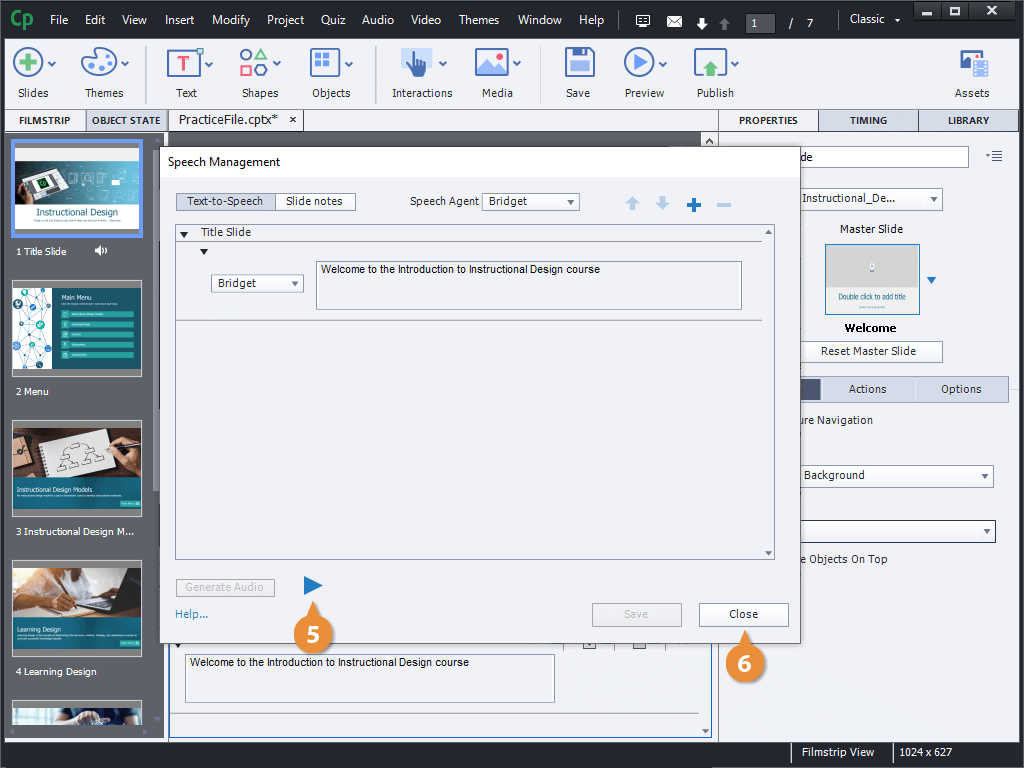
The Speech Management window opens, listing the notes that have been marked for text-to-speech.
You can continue editing the note in this window and generate new audio until you get it just right. You can even change the voices each time.